

Client-side Storage - Part 1
Learn how to store data on your browser with cookies, and Web Storage API using different programs.

Lover of all things tech. I write articles on Front-end development, JavaScript, React, Python, and anything that makes my life easier.
Thanks for stopping by! 😊💛
If you've been having some trouble trying to understand how Client-side storage works or you just want it explained clearly and simply with real programs and apps or you're a web guru and you just want to brush up your skills on the topic, then keep reading! 😊
In this series, we'll be exploring the different facets of client-side storage on the web.
📚 Prerequisites
In this article, we'll be using
- HTML5
- JavaScript
If you're not confident in those two languages, I'd advise you to brush up on them using this link for JavaScript and using this for HTML5.
For Part 1 of this series, we'll be covering both Cookies and Web Storage API.
🛠 Setup
Feel free to use any editor and local server of your choice, but I'll be using VScode and xampp in this article.
I strongly believe in learning by doing, so we'll be applying the skills we learn in different programs for this article.
🧾History & Where We Came From 🍪
Web storage has existed for years in form of cookies, dating back to 1994. Cookies are small pieces of data in a data file that websites often use to identify your device on their network or store your previous browsing activity or information, and in JS, a cookie is simply created by a simple call on the document object which we'll explore below.
💻 Forms of Client-Side Storage
There are 4 ways you can store data on your local machine while offline or without a server database which are:
- Cookies
- Web Storage API
- IndexedDB
- Cache API
We won't be exploring WebSQL since it is no longer supported by most major browsers. See more info here.
In this article, we'll be using two programs, ShopCarter - a simple shopping online store that allows you to place your items on a cart via drag and drop or click, allows you to save those items even when you close the tab; and the Gallery program from my previous article (P.S if you haven't checked that out, then I can boldly assume you're not a man/woman of culture 😒. Check it out and you'll automatically become one 😎[this has been verified to be true], if you already have, you deserve one chill bottle of Nutri-milk [best drink ever by the way :) ]).
🍪 Cookies
As mentioned earlier, cookies are created via a call (calling the cookie property) on the document object and storing the cookie value there. Cookies can hold only a small amount of data, the max size being 4096 bytes (0.004096 megabytes), so they're used to store little information like names, addresses, or emails. However, Cookies should not be used to store large files like images as it will slow the bandwidth of your network and you will lose some files previously stored on them.
document.cookie = `cookie-name=cookie-value; expires=date-in-GMTString-format; path=/`;
A cookie is stored in a key-value pair as seen above.
The optional path parameter, which tells the browser which page/directory to page the cookie is needed, if not specified, it defaults to the current directory /.
Note: You can create a cookie without the
expiresparameter if you don't want to specify an end time or you want to leave the deletion job for your browser, but it's not advised since we cannot rely on the browsers all the time clearing our cookies for us. Therefore, theexpiredparameter should be filled with a date value.
Since this article is focused more on a hands-on method of learning, fork and download the ShopCarter repo and navigate to the main.js file in the js folder of the article folder.
On line 24 of the main.js file, inside the saveName() function;

Add this code.
document.cookie = `Name=${element}; expires=30 Aug 2021 12:00:00 UTC;`
This saves the user's name passed to the function parameter element in the Name key and sets an expiry date to 30th of August, 2021 at 12:00 pm UTC.
But, we're missing some key things. What about getting the cookie when we reload our page and displaying it?
To get our cookie from the document object, we simply call the cookie property to get all cookies in the format it was saved in.
But, that would simply return this.
// Output if called.
Name="user's name"; expires=30 Aug 2021 12:00:00 UTC;
This is not exactly what we want since it's just the user's name value we're looking for and not the rest.
We need a way to just get the Name key value from our cookie property without the expires parameter or any other one, which leads us to the getCookie function in line 50 of our JS file.

Insert this code in line 52 of your JS file to only get the cookie's value from its key.
    name = `name =`;
    let ca = document.cookie.split(';');

    for (let i = 0; i < ca.length; i++) {
        let c = ca[i];
        while (c.charAt(0) == ' ') c = c.substring(1, c.length);
        if (c.indexOf(name) == 0) return c.substring(name.length, c.length);
    }

    return null;
The code above splits the cookie string to get the key specified from the parameter name and returns its corresponding value if found, else it returns null.
We'd also need to add a function that opens a popup menu and accepts the user's name as an input.
On line 138 of the popUp function;

Add this code to accept the user's name as an input.
    let name = document.querySelector('#name-section h2 #name');

    if(name.textContent.length >= 1){
        return;
    }

    let person = prompt('Please enter your name', 'Sunkanmi Fafowora');
    let text;
    if (person == null || person == '') {
        text = 'John Doe';
        saveName(text);
        name.textContent = text;
    } else {
        text = `${person}`;
        saveName(text);
        name.textContent = text;
    }
The code above queries the DOM for the user's name id tag and checks if the name has already been set, if it has, we exit the function, if not, a prompt for the user is created and the user's name is received and saved in our cookie (from the saveName() function call) and a copy is passed to our DOM element.
Now, we can create, get, and display our cookies, but what if the user changes his/her mind and decides to delete it?
Let's account for that scenario by creating a deleteName function that simply deletes the Name cookie set earlier.
To delete a cookie, we simply set the cookie to an earlier date and time. i.e Instead of setting the cookie to expire on 'August 30, 2021', for example, we can set it to expire on 'August 30, 2020' (a year earlier).
On line 56 of the deleteName function;
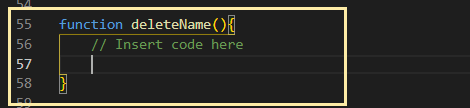
Add this code.
    let text = document.querySelector('#name');
    if(text.textContent != null || text.textContent != ""){
        document.cookie = `Name=; expires=30 Dec 2020 12:00:00 UTC`;
        text.textContent = "";
    }
This queries the DOM for the name tag id, sets our cookie to an earlier date, and also removes the user's name from the DOM if it exists.
Awesome! We can now create, delete, and get our cookie anytime (well, till August 30th of this year). What's left is to call all of them on user interaction or when the page loads.
Since this is a little Shop with just 4 of my favorite items, let's call the popUp menu function that accepts the user's name when an item is dropped on the cart or added via a click event on the item.
On line 88 of the addItemToCart function and line 16 of the drop function in the drag-and-drop file;

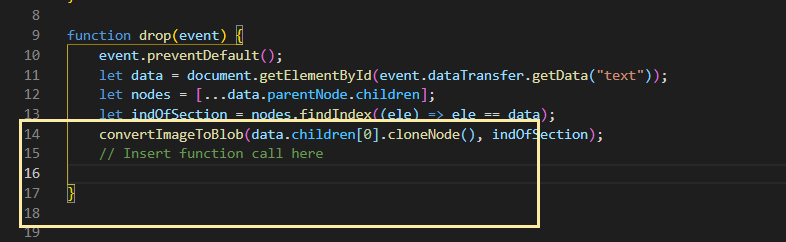
Add this function call to it.
popUp();
Now, on line 20 of your main.js file, inside the onload function
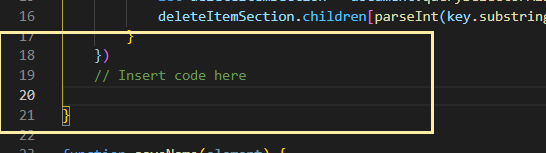
Add this code to output the cookie on the DOM.
    let name = getCookie('Name');
    let nameTag = document.querySelector('#name');
    if(name != null){
        nameTag.textContent = name;
    }
This gets the cookie value with key Name, and outputs it to the name id tag on the DOM.
The final piece of code to add is the deleteName function to the button sibling of the name tag so that when it's clicked, it's able to delete the cookie and the name from its sibling tag.
On line 22 of the index.html file, add this function call to the onclick function
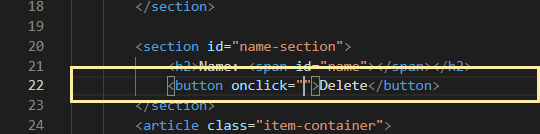
deleteName();
Amazing work! You just finished creating a cookie and used it in the ShopCarter program, why don't you navigate to the article folder on your local machine to see the good work you've done in action. I'm sure it'll look something like this when you click on an item or drag it to the cart.

Once you've set your name you should be able to add more items to your cart, add additional items to already existing ones, and delete the name set.
🛑 Limitations
Cookies have proven to be useful web storage technologies in the past, but it does possess several limitations if you're considering using it for a live web app. Which are:
Cookies are known to be insecure as information is stored in clear text, and if an attacker can inject a Cross-site Scripting (XSS) on the payload (actual data pack sent with the GET method in HTTP) of your website/web app, the script could steal the user's information and send to the attacker. There are ways to actually prevent this if you really must use a cookie (it's still not advisable though!) Check out this post for more info.
Cookies are small in size and max number depending on the browser, some browsers may offer more or less, regardless it's still a small number (for example the maximum size for Chrome and Firefox is 4096 and 4097 bytes respectively, while the maximum size of a cookie for Internet explorer is 5117 bytes).
Users can delete cookies and they have the option of disabling them on their browser from its settings which makes them entirely useless if disabled or deleted.
🕸👨🏾💻 Web Storage API
Web Storage API provides an easier mechanism to store data on the client. Data is stored in key-value pairs, similar to the way cookies are stored, but just more intuitive.
Web Storage API comes in two forms, which are:
localStoragesessionStorage
localStorage has a separate storage area on the browser and persists even when the browser tab is closed, data in localStorage can only be cleared by clearing the cache or with JavaScript code, and it can store data of up to 5MB, however, this can be increased by the user if needed. Check out this info from HTML5 specification for more.
sessionStorage is similar to how localStorage is and how it works, the difference is that the data is available as long as the browser tab is open (even for page reloads or restores). The data stored in sessionStorage is cleared when the tab session is closed or via JavaScript.
Let's look at how we can do this in code.
LocalStorage and SessionStorage
You can store items on both localStorage and sessionStorage by calling their setItem method.
localStorage.setItem('item-name', value);
sessionStorage.setItem('item-name', value);
And to get the item stored, simply use the getItem method on localStorage, passing the item-name you passed earlier in the setItem method.
localStorage.getItem('item-name');
sessionStorage.getItem('item-name');
Setting and getting items in both session storage is basically the same, the difference in their syntax is just the name used.
And if you want to remove an item or clear all items in localStorage and sessionStorage simply use the removeItem method passing the item key and the clear method respectively to do so.
i.e
// Remove an item
localStorage.removeItem('item-name')
sessionStorage.removeItem('item-name')

// Clear all items
localStorage.clear()
sessionStorage.clear()
Now, time to use what we've learned, and see it in action! 🚗💨
Note: Make sure you clear your browser cache and localStorage before moving on, as the resources from the previous program will be saved there since it's from the same domain.
Fork and download the Gallery app from this repo and navigate to the main.js file in the js folder of the article folder.
On line 40 of the uploadFile function,

Copy this code to create an array called indArr.
let indArr = [];
On line 66, just above the addImage function;
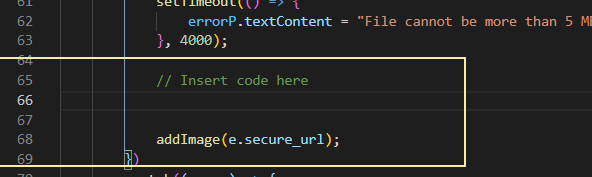
We'll be using localStorage for this program since we want the data to persist for another session.
Add this code to it to save your image URL uploaded to localStorage.
if (localStorage.getItem('img-0') != null) {
    Object.keys(localStorage).forEach((key, index) => {
        indArr.push(index + 1);
    })
} else {
    indArr.push(0);
}

localStorage.setItem(`img-${indArr[indArr.length-1]}`, e.secure_url);
We use the Object.keys() method to iterate over all the keys in localStorage and set our item key based on the last key index passed to localStorage.
Finally, at the top of the main.js file, copy and paste this code to get all the items in localStorage.

window.onload = () => {
    Object.keys(localStorage).forEach((key, index) => {
        addImage(localStorage.getItem(key));
    })
};
The code above would load all your images and passes them to the addImage function for it to show on the DOM.
At the end of the day, you should have something similar to this even when you refresh the page or close the browser.
As you've seen, even when I open another session and access the site, it's still the same.
🛑 Limitations
Like Cookies, Web storage API is insecure and can be exploited by attackers who want to perform Cross-site Scripting (XSS) attacks, so I'd advise to not store sensitive information on them (check out this cheat sheet for more information). i.e don't upload images or sensitive files that you can't have on Instagram or Twitter and don't store tokens, credit card information, etc on them.
Although storage capacity is higher than cookies (~5MB), it's still limited if you're building a large web application or you need it to function offline.
It can only store strings, meaning that data types like float, integers, and even images have to be converted to string data (read this for more info) and in the case of images, a blob for it to work.
Web Storage API is very easy to use and implement, but it is synchronous(meaning it runs one operation at a time, which can slow performance if you want two processes happening at the same time) and it can't be used with web workers. This means that a large and complex application that wants to take advantage of background processes, chrome extensions, etc won't be able to use it which will slow down the performance of your web app.
✍🏾 Conclusion
With Cookies and Web Storage API, one can be at ease and not be worried about having to use a backend server to store simple information and access even when offline, and with client-side storage technologies, we can reduce network traffic which makes our web apps and sites faster and more reliable. However, both have limitations ranging from size to security, performance, and stored data types.
In Part 2 of this series, we'll be exploring how Cache API and IndexedDB can make up for the above limitations (with a program example of course. 😉) using a Windows 10 Pro Emulator I recently built using HTML5, CSS3, and JS.
Thanks a bunch for reading, even to this point of the article (You're super awesome for that, wow!😅). This article was a bit lengthy, but I do hope it was worth your time. Hope to see again you in Part 2 of the series! 😊
✅ Useful Resources
- Mozilla Cookie Documentation
- Cookies by w3schools
- Mozilla Web Storage API Documentation
- Using the Web Storage API Mozilla article


