


How to Use React-Admin with Firebase
Learn how to use react-admin with Firebase in 10 easy steps


As primarily a Frontend dev, I find the task of setting up an admin dashboard for my apps to be quite tedious, and as a Full-stack developer, StackOverflow is my best friend when I run into several errors with my backend server and database.
However, I recently discovered a pretty easy and fast way to set up an admin panel without the need of worrying about my server or database or security, especially when I am short on time and clients have the expectation that their products should be done in light speed, and as you guessed it! It's React-admin with Firebase.
React-admin is simply a frontend Framework for building data-driven applications running in the browser on top of REST/GraphQL APIs, using ES6, React, and Material Design it's an admin panel framework for building admin panels, and Firebase provides the backend server and database that we'll be using.
In this article, we will learn how to use react-admin with Firebase to create an admin dashboard for our React app.
Requirements
Intermediate knowledge of React
Steps to Setting Up React-Admin with Firebase
Create a react project with any name in your current directory, and follow these simple steps below. Don't forget to change your directory into the project once you've created it.
Now, inside your React app directory, follow the following steps
1. Install react-admin
npm i react-admin
2. Install Firebase
npm install --save react-admin-firebase firebase
Note: Some dependencies (e.g react@^16.9.0 react-dom@^16.8.0) may require installation, install the versions that pop up as warnings in your terminal so you won't have any issues when using the packages
3. Create these files
a. Create a new folder called comments in your src folder, and create a js file called comment.js with this code below:
import React from 'react';
import {
  Datagrid,
  List,
  Show,
  Create,
  Edit,
  SimpleForm,
  TextField,
  TextInput,
  EditButton,
  DeleteButton,
  ImageField,
  ImageInput
} from 'react-admin';

export const CommentShow = (props) => (
  <Show {...props}>
      <Datagrid>
        <TextField source='Comment Section' />
        <ImageField source="Profile-Pic.src" title="title" />
        <EditButton />
        <DeleteButton />
      </Datagrid>
  </Show>
);
export const CommentList = (props) => {
  return (
    <List {...props}>
      <Datagrid>
        <TextField source='Comment Section' />
        <ImageField source="Profile-Pic.src" title="title" />
        <EditButton />
        <DeleteButton />
      </Datagrid>
    </List>
  )
};
export const CommentCreate = (props) => (
  <Create {...props} >
    <SimpleForm>
        <TextInput source='Comment Section' multiline/>
        <ImageInput source="Profile-Pic" label="Profile-Pic" accept="image/*">
          <ImageField source="Profile-Pic" title="title" />
        </ImageInput>
    </SimpleForm>
  </Create>
);

export const CommentEdit = (props) => (
  <Edit {...props}>
    <SimpleForm>
        <TextInput source='Comment Section' multiline/>
        <ImageInput source="Profile-Pic" label="Profile-Pic" accept="image/*">
          <ImageField source="Profile-Pic" title="title" />
        </ImageInput>
    </SimpleForm>
  </Edit>
);
If you noticed, I added an image field and input, we'll look into how to display our images soon.
b. Now, in your source (src) folder directory, create a file and name it FIREBASE_CONFIG.js. Leave it empty, we'll be putting content to the file later on.
Nice! Let's move on to the next step.
4. Copy this code to your App.js file:
import React from 'react';
import { Admin, Resource } from 'react-admin';
import {
  FirebaseAuthProvider,
  FirebaseDataProvider
} from 'react-admin-firebase';
import { CommentList, CommentEdit, CommentCreate, CommentShow} from './comments/comments';

function App() {
  return (
    <Admin
    title="Admin Dashboard"
    >
    <Resource name="Comments" list={CommentList} show={CommentShow} create={CommentCreate} edit={CommentEdit} />
  </Admin>
  );
}

export default App;
5. Setting up Firebase
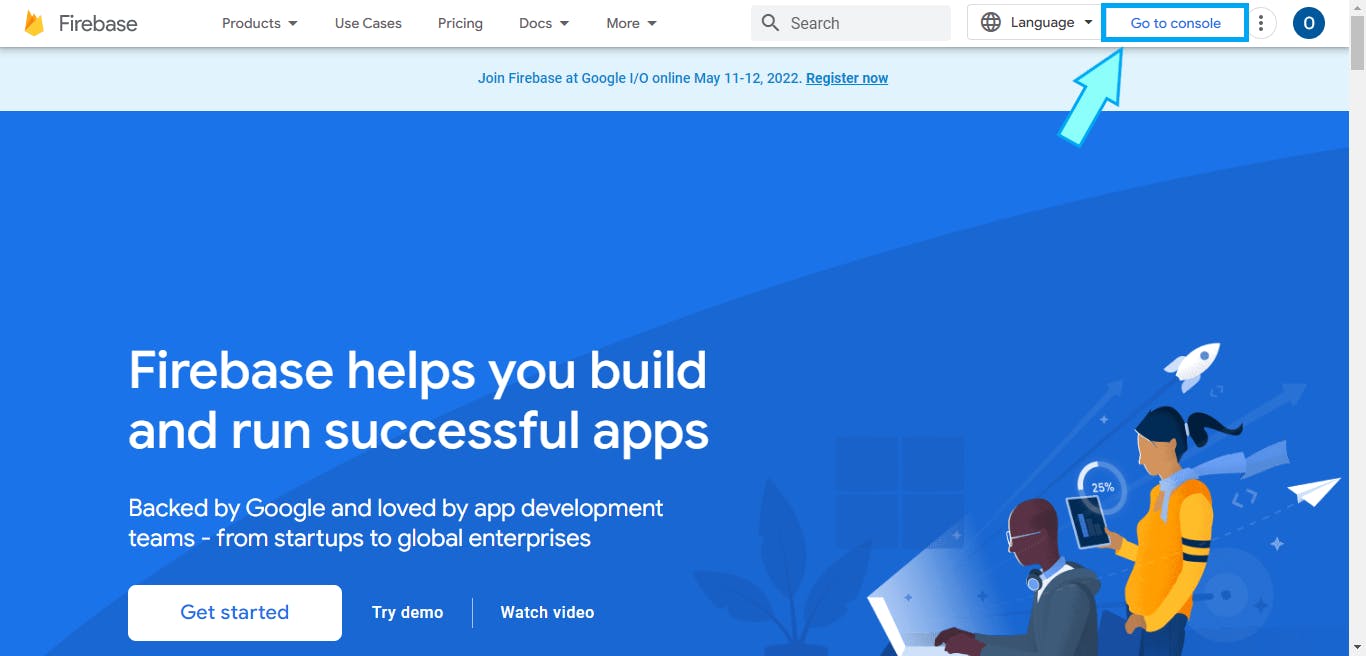
a. Head over to firebase.google.com and click the "Go to console" link at the top right.
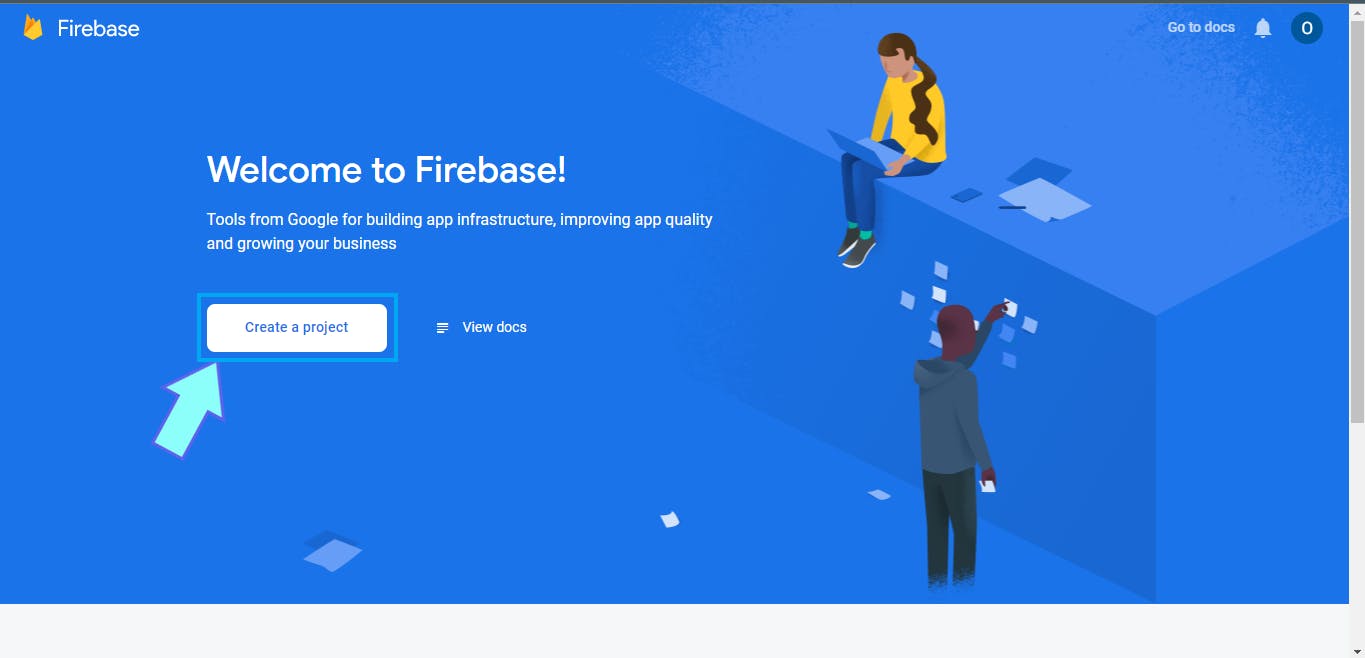
b. Then, click the "Create a project" option
That'll take you to a page where you can type in your project name and other details. Move to the next step once you're there.
c. Type in your desired project name, I'm naming mine "React-admin-firebase-example" for this article
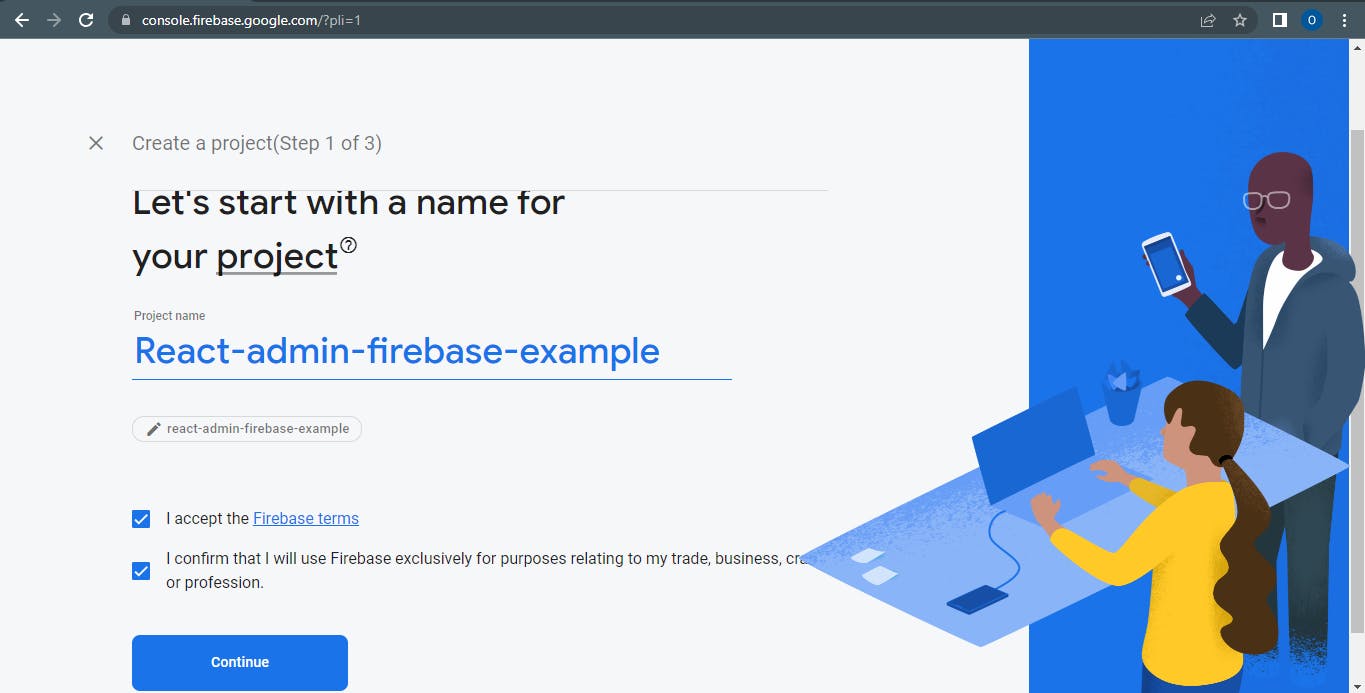
Make sure you tick the necessary details to continue with your project setup.
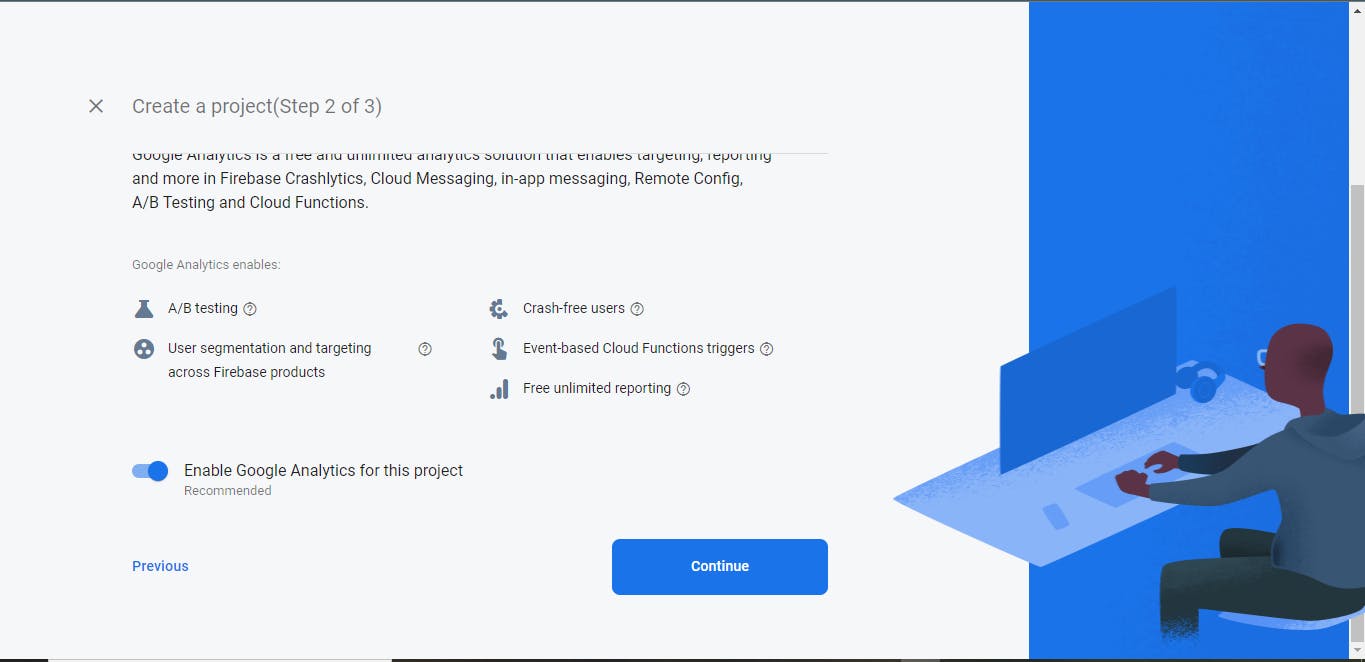
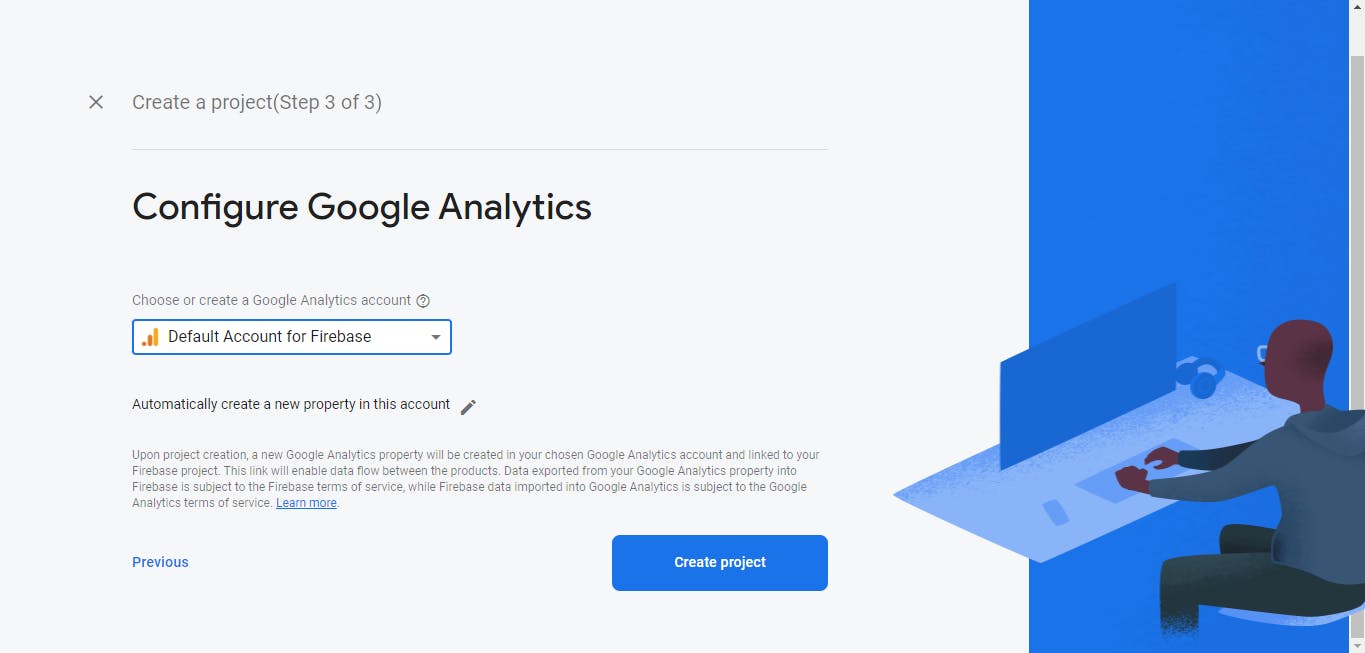
Feel free to enable google analytics if you want (not mandatory), I'm enabling mine for this project.
And finally, select the "Default Account for Firebase" option from the dropdown presented to you in the final step, and click the "Create project" button once you're done.
6. Setting up your Firestore Database
Nice! You've successfully set up your Firebase project, now, select the "Firebase Database" on the left panel, and click the "Get Started" button to create a database and set its location.
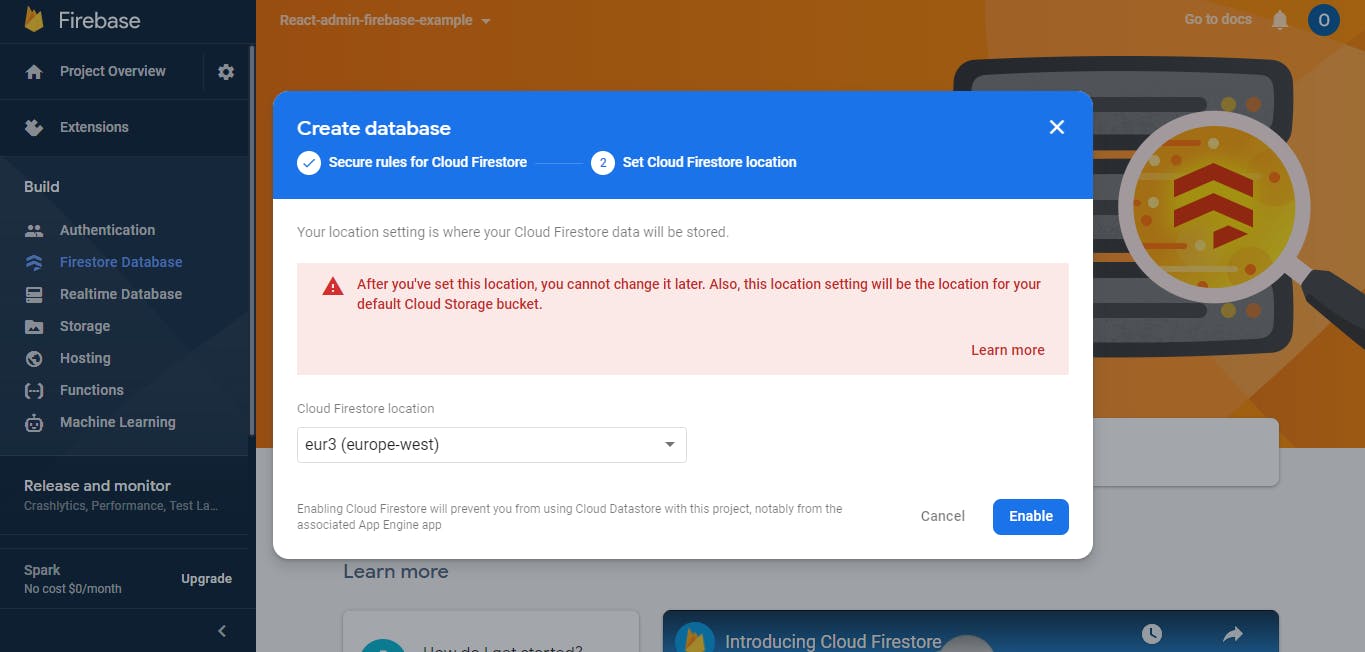
I've set mine to europe-west cause that's closer to my location, you can set yours to anyone you prefer.
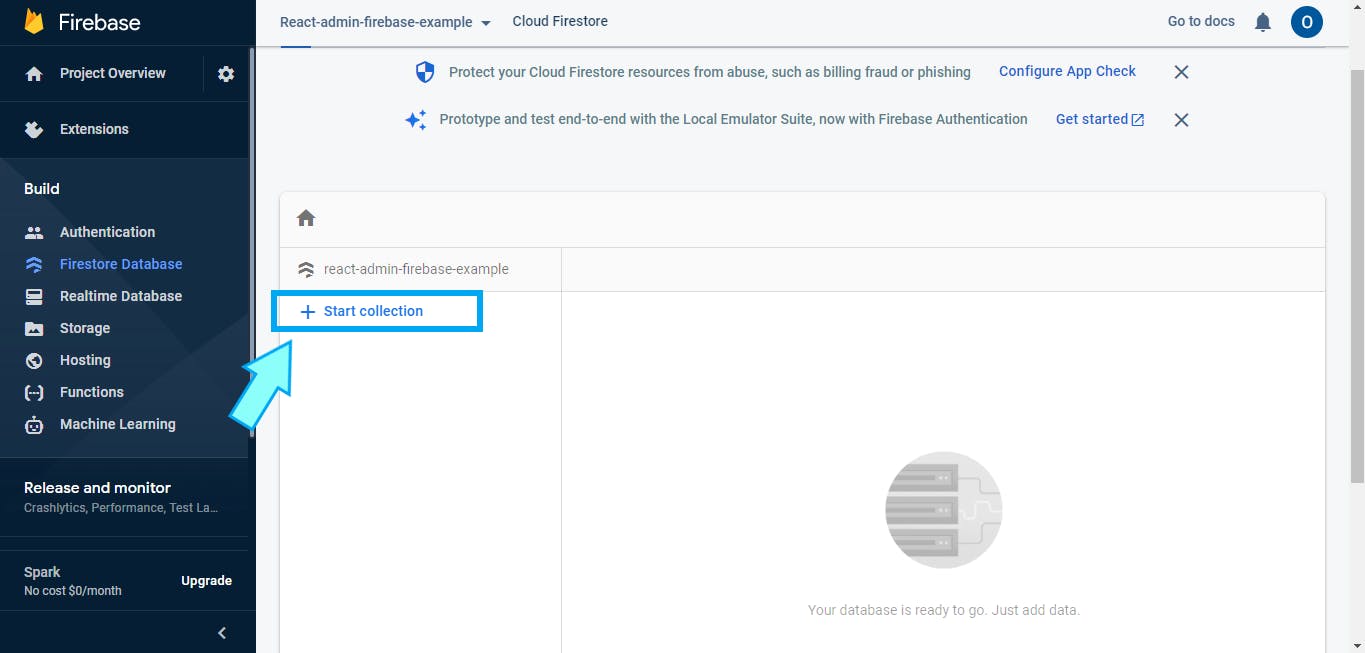
Next, create a collection named "Comments" via the "Start collection" link on the page you're taken to, the same name as the props passed to the Resource component in App.js i.e
<Resource name="Comments" .../>
Next, create a field called "Comment Section" and "Awesome article so far :)" as its value. 🙂

Note: You won't be able to access your collections with your current rules.
Do change them to the code below so you'll be able to edit the content and read the details anytime you log in.
rules_version = '2';
service cloud.firestore {
  match /databases/{database}/documents {
    match /{document=**} {
      allow write: if request.auth != null;
      allow read: if true;
    }
  }
}
Also, since we'll be uploading images, head over to the Storage > Rules, and paste this code there to allow your app to upload, read, and delete images.
rules_version = '2';
service firebase.storage {
  match /b/{bucket}/o {
    match /{allPaths=**} {
      allow write: if request.auth != null;
      allow read: if true;
    }
  }
}
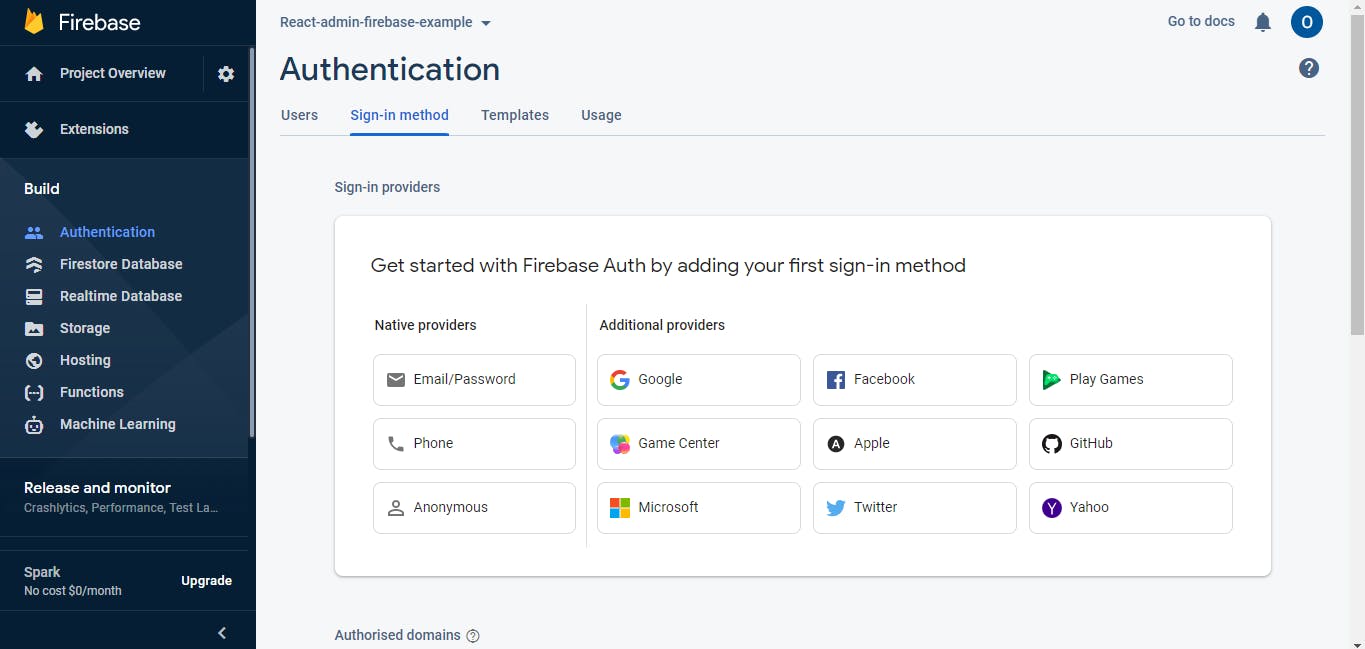
7. Setting up Authentication in Firebase
Click the Authentications section on the left panel and click on "Get Started", then click the "Sign-in method" option on the nav menu.

Since we'll be using just the Email and password for this app, let's select and then enable the "Email/Password" option under "Native Providers".
Note: If you want to add a new domain to access your created database, simply scroll down to "Authorized Domains" and add the domain you want to give access to - useful for apps in production.
Make sure your providers now have "Email/Password" enabled. It should look like once you're done.

Now, head over to the Users panel on the nav menu, and click "Add User" to add a user with an email address and password.

For mine, I'm using sunkanmi@demo.com for the email, and password as its password (not advised, please don't replicate this password in production 😌).
Great! Congrats, we're more than halfway done! Move on to the next one once you're done with this step.
8. Firebase Configuration
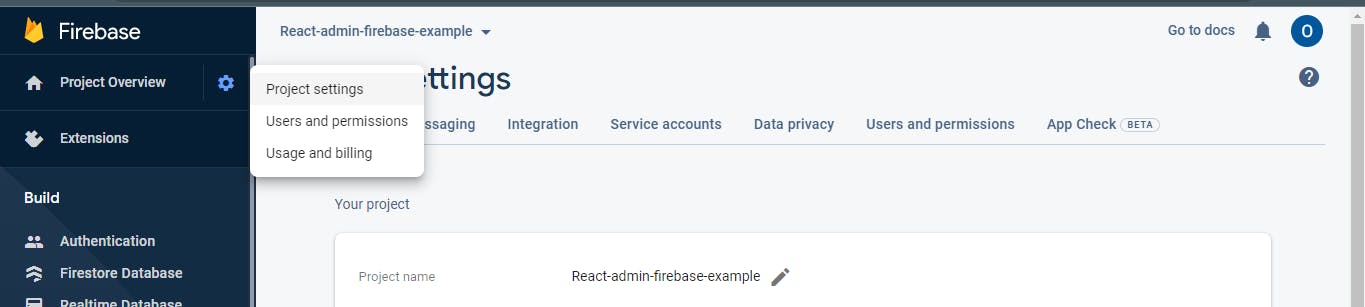
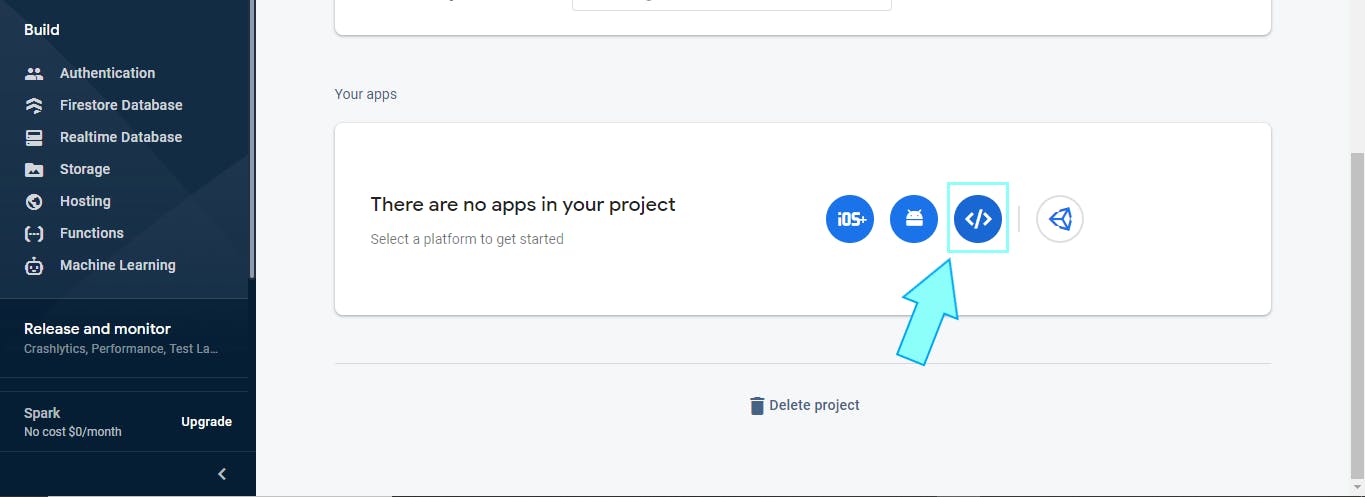
Remember the FIREBASE_CONFIG.js file we created earlier? We'll be pasting some content into it now. Head over to the "Project Settings" on the top left corner next to "Project Overview", scroll down to the "Your apps" section, and create a "Web project" via the "</>" icon, as shown below.
Then type in your app name, and register. This should take you to where you can copy your firebase config.
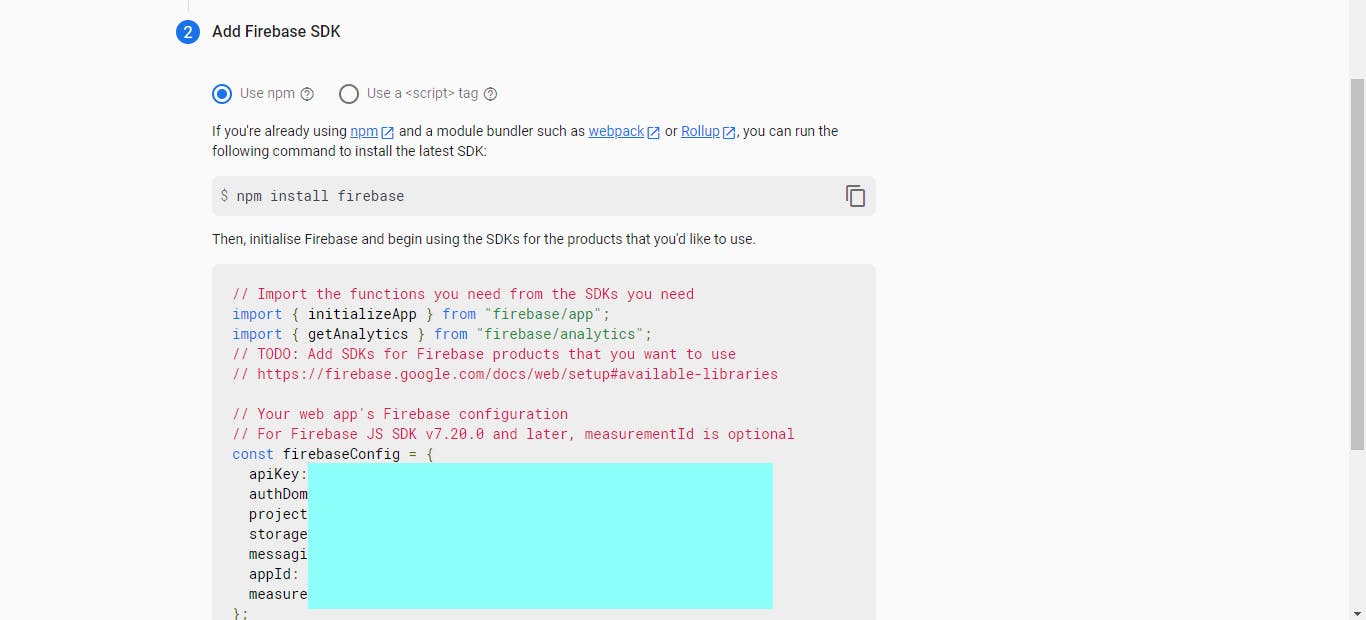
We'll tweak some things here, but copy the contents there, and paste them in FIREBASE_CONFIG.js;
Now, in FIREBASE_CONFIG.js, import the following to use Firebase in your app
import firebase from 'firebase/compat/app';
import 'firebase/compat/auth';
import 'firebase/compat/firestore';
and, copy and paste this after your firebaseConfig variable
// Initialize Firebase
const firebaseApp = firebase.initializeApp(firebaseConfig);
//  In case you want to load content from db to your app
const db = firebase.firestore();
const auth = firebase.auth();
export { firebaseApp, firebaseConfig, auth };
export default db;
9. Finishing touches
Next, import this into App.js
import { firebaseConfig as config, firebaseApp as firebaseAppInstance } from './FIREBASE_CONFIG.js';
Also copy this to App.js
const options = {
  app: firebaseAppInstance,
  persistence: 'session'
}

const dataProvider = FirebaseDataProvider(config, options);
const authProvider = FirebaseAuthProvider(config, options);
This simply uses the data provider and auth provider supplied by firebase with your configurations and options.
Finally, pass them as props to Admin component like this
<Admin
      dataProvider={dataProvider}
      authProvider={authProvider}
      title="Admin Dashboard"
   >
...

/>
Awesome! Once, you're done, App.js should look like this:
import React from 'react';
import { Admin, Resource } from 'react-admin';
import {
  FirebaseAuthProvider,
  FirebaseDataProvider
} from 'react-admin-firebase';
import { firebaseConfig as config, firebaseApp as firebaseAppInstance } from './FIREBASE_CONFIG.js';
import { CommentList, CommentEdit, CommentCreate, CommentShow} from './comments/comments';

// Optional
const options = {
  app: firebaseAppInstance,
  persistence: 'session'
}

const dataProvider = FirebaseDataProvider(config, options);
const authProvider = FirebaseAuthProvider(config, options);

function App() {
  return (
    <Admin
      dataProvider={dataProvider}
      authProvider={authProvider}
      title="Admin Dashboard"
    >
    <Resource name="Comments" list={CommentList} show={CommentShow} create={CommentCreate} edit={CommentEdit} />
  </Admin>
  );
}

export default App;
10. Run the app!
On the project terminal, run
npm start
And once it's loaded up, input your login details, and your app should be up and running!
Here's a quick demo of me creating some comments with this.
Summary
In this article, we learned how to:
Set up a firebase project and app
Created and used a collection in Firebase Firestore
Set up and used React-admin
Integrate Firebase with React project
And that's it! Thank you for your time, and I hope you enjoyed reading this! If you have any questions whatsoever, feel free to post them in the comments section below!
Do have a lovely day ahead! 😊
Resources
Github repo - how-to-use-react-admin-with-firebase
Official React admin Firebase repo - react-admin-firebase
React-admin repo - react-admin