


How to Convert React App to Preact
A faster and size-friendly alternative


Preact is a fast 3kB alternative to React with the same modern API. There are mainly two key benefits it sells over React, speed and size. I've found out that React v16 is about 31.8kB, while Preact is as little as 3kB, insane right? In fact, there are several other benefits to this, and Mikołaj's article on 'What is Preact and when should you consider using it?' explains it best with more benefits which are:
- ‘this.props’ and ‘this.state’ are passed directly to render() method - which can be later destructed
- There is no need to use ‘className’, you can just use ‘class’ to pass CSS classes in
- No support for PropType validation in the base core - if you want to use it, you need to import it from ‘preact/compat’ module
- Preact doesn’t support Synthetic Events - Preact is based on the browser's ‘addEventListener’
Coming from an HTML 'class' syntax, I can readily import my HTML code without having to worry about changing that part to 'className', especially with code I've built using Vanilla HTML5 with no libraries, you find out that this saves time and effort during production. Without further ado, let's get into it!
How to Switch from React to Preact
1. preact-compat Alias using Webpack (Easy)
Although there are other aliases with other bundlers, we'll be using webpack as it's the most popular JavaScript bundler, and it's a preferred pick for many. If Webpack isn't your preferred option and you want to alias using other packages (i.e Parcel, Browserify, etc), check out this link.
The first step we need to do is to install preact & preact-compat in our React project.
Run this code on your terminal to install preact and preact-compat
npm i -S preact preact-compat
Then, in your current directory where you have your react project (outside source), create a webpack.config.js file and paste this code to it.
const path = require('path')

module.exports = {
    mode: 'development',
    entry: path.resolve(__dirname, 'src', 'index.js'),
    output: {
      path: path.resolve(__dirname, 'dist'),
      filename: 'bundle.js'
    },
    resolve: {
        alias: {
            "react": "preact-compat",
            "react-dom": "preact-compat"
        }
    },
}
And voila! You can test and run with
npx webpack --config webpack.config.js
to check if it works fine. If everything works fine, your output on your terminal should look like this:
asset bundle.js 1.25 KiB [emitted] (name: main)
./src/index.js 46 bytes [built] [code generated]
webpack 5.72.1 compiled successfully in 217 ms
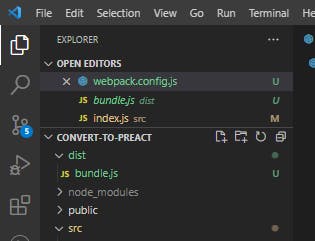
You'll also notice that a bundle.js file has been created in a dist folder in your project directory like the one below.
2. Switching via Babel (optimal)
To be able to use Babel to transpile your React code to Preact, install:
npm install --save-dev @babel/core @babel/preset-react @babel/plugin-transform-react-jsx
Then, install preact with:
npm install --save preact
Preact uses its h() as its JSX pragma function, so we need to switch React.createElement() out for preact's h().
Create a file, call it.babelrc, and add this preset to it:
{
    "plugins": [
      ["@babel/plugin-transform-react-jsx", { "pragma": "h" }]
    ]
 }
Then you're good to go!
Note: Make sure to check out Preact's documentation to find out what's being added and what's currently missing!
Conclusion
In this article, we learned how to convert our React apps to Preact using an alias with webpack, and Babel. Preact is currently being used by companies like Google, Uber, and more in their tech stack to boost their web app's performance, speed, and size reduction, and using it in our React app project will also do the same. Thank you for reading and I hope you have a lovely day ahead! 😊